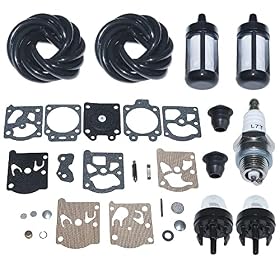
A flooded gas trimmer usually has too much fuel and not enough air. Use the correct starting position, let the engine clear, then inspect the spark plug, air filter, fuel, and carburetor if the problem continues.
A gas trimmer is usually flooded when excess fuel wets the spark plug and prevents ignition. The common signs are a strong gasoline smell, a wet spark plug, sputtering after repeated pulls, or an engine that briefly starts and dies. Stop pressing the primer, move the trimmer outdoors, and use the steps below to clear it safely.
What to do first
Move the trimmer outdoors or to a well-ventilated area away from flames, cigarettes, and sparks.
Turn the ignition switch off and let the engine cool if it is hot.
Do not keep pressing the primer bulb. Each press adds more fuel.
Check the owner's manual for the manufacturer's flooded-engine procedure. Starting controls differ by model.
Never test for ignition near spilled gasoline. Wipe up spills and allow vapors to disperse before continuing.
How to clear a flooded gas trimmer
For many two-cycle trimmers, the general clearing procedure is:
Set the choke to off, run, or the position specified for a warm or flooded engine. Do not use the full-choke position.
Hold the throttle trigger fully open if the manual permits this procedure.
Pull the starter several times with firm, steady strokes. The open throttle allows more air into the engine.
If the engine begins to fire, continue pulling briefly while gradually returning the throttle and controls to the normal running position.
Once it starts, let it run at a moderate speed for a short time so excess fuel can clear.
If the engine does not start after several pulls, stop rather than repeatedly adding fuel. Remove and inspect the spark plug before continuing.
Product prices and availability are accurate as of the date/time indicated and are subject to change. Any price and availability information displayed on Amazon.com at the time of purchase will apply to the purchase of this product.
Check the spark plug
A flooded engine commonly leaves the spark plug wet with gasoline. Remove the plug only after the engine is cool, using the procedure and tool specified by the manufacturer.
If the electrode is wet, allow it to dry completely or replace the plug with the correct type.
If the plug is heavily carbon-fouled, cracked, or damaged, replacement is more sensible than continued cleaning.
Check that the plug wire or boot is fully seated after reinstalling.
Do not guess at the plug gap. Use the specification in the owner's manual.
Keep the plug away from fuel while it is drying. If you check for spark, follow the manufacturer's instructions and keep the plug threaded into the engine or use the specified grounding method. If you are not comfortable working around ignition voltage or gasoline, have a qualified small-engine technician handle the check.
Product prices and availability are accurate as of the date/time indicated and are subject to change. Any price and availability information displayed on Amazon.com at the time of purchase will apply to the purchase of this product.
If the trimmer floods again
A trimmer that repeatedly floods usually has a starting, fuel, airflow, or carburetor problem rather than a one-time mistake.
Incorrect choke or primer use
The choke is normally used for a cold start, not an engine that has already been pulled several times or has recently run. After the engine fires, move the choke to the run position as directed. Pump the primer only the number of times stated in the manual. Holding or repeatedly pressing it can send too much fuel into the engine.
Restricted air filter
A dirty or oil-soaked air filter limits incoming air and makes the mixture too rich. Remove the filter and clean or replace it according to the manufacturer's instructions. Do not run the trimmer without its filter unless the manual specifically allows a brief service check.
Old or incorrect fuel
Stale gasoline, the wrong fuel mixture, or fuel that has separated can make starting difficult and encourage repeated priming. Drain questionable fuel into an approved container and use the fuel type and two-cycle oil ratio specified for the trimmer. Never guess the oil ratio.
Do not use fuel that has been contaminated with water, dirt, or debris. Follow local rules for disposal of old gasoline.
Carburetor or fuel-system fault
A worn carburetor needle, damaged diaphragm, stuck inlet valve, or leaking primer system can allow fuel to enter the engine when it should not. Signs include fuel dripping from the carburetor, a primer bulb that will not return normally, gasoline in the air-filter housing, or flooding even when the starting procedure is correct.
At this point, a carburetor repair kit or replacement carburetor may be appropriate only if it matches the exact trimmer model and you can follow the service instructions. Otherwise, professional service is the safer choice. Carburetor adjustments should not be made by guesswork.
Fuel lines, tank vent, and seals
Cracked fuel lines, a damaged fuel cap vent, loose connections, or deteriorated gaskets can disrupt fuel metering. Inspect visible lines for cracks, softness, kinks, or wet spots. Replace damaged fuel-system parts with components specified for the trimmer. Do not operate the machine if gasoline is leaking.
Product prices and availability are accurate as of the date/time indicated and are subject to change. Any price and availability information displayed on Amazon.com at the time of purchase will apply to the purchase of this product.
Why a gas trimmer floods after storage
Flooding after winter or long-term storage is often linked to stale fuel, a sticking carburetor component, or a deteriorated fuel line. Before storing the trimmer, follow the manual's fuel-storage instructions. Depending on the model, this may involve draining the tank and running the carburetor dry, or using approved fresh fuel stabilizer.
Store the machine upright in a dry, well-ventilated location away from ignition sources. Do not store gasoline in an unapproved container or indoors where fuel vapors can accumulate.
When to stop troubleshooting
Replace the spark plug if it remains fouled or damaged after the flooding is cleared. A fuel-system part may be the reasonable next step when the trimmer has visible leaks, repeatedly floods with the correct starting procedure, or contains cracked fuel lines.
Consider replacing the trimmer instead of repairing it when the carburetor, ignition system, tank, and fuel lines all need attention, or when repair costs approach the value of the machine. If the trimmer smells strongly of fuel, leaks, has damaged wiring, or still will not start after a correct plug and fuel check, disconnect it from use and have it inspected by a qualified repair technician.
Common signs include a strong gasoline smell, a wet spark plug, repeated failed pulls, sputtering, or an engine that starts briefly and dies. Stop pressing the primer and use the manufacturer's flooded-engine procedure.
Will a flooded gas trimmer fix itself?
Excess fuel may evaporate if the trimmer sits in a safe, well-ventilated location, but a wet spark plug can remain difficult to ignite. After the engine cools, inspect or replace the plug as directed and use the correct no-choke starting procedure.
Should I press the primer bulb when a trimmer is flooded?
Usually no. Pressing the primer adds fuel and can make flooding worse. Follow the owner's manual because the exact clearing procedure varies by model.
Why does my gas trimmer keep flooding?
Repeated flooding can result from incorrect choke or primer use, a restricted air filter, stale or incorrect fuel, a leaking carburetor, damaged fuel lines, or a faulty primer system. Visible fuel leaks require repair before further operation.