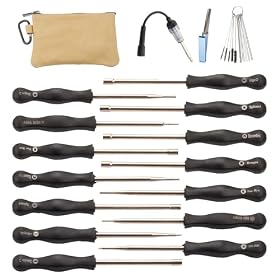
A primer bulb that will not fill or stay firm is often connected to stale fuel, clogged fuel lines, a blocked filter, or a damaged bulb. Follow these checks in order before replacing the trimmer.
A primer bulb and stale fuel can make a gas string trimmer hard to start or prevent it from starting at all. Old fuel may clog the carburetor and fuel filter, while a cracked primer bulb or leaking fuel line can keep the bulb from drawing fuel. Start by removing the stale fuel and checking the bulb, lines, filter, and air filter before assuming the engine has failed.
Safety first
Work outdoors or in a well-ventilated area away from flames, sparks, cigarettes, and appliances with pilot lights. Let the engine cool completely. Wear fuel-resistant gloves and eye protection, and follow the trimmer manufacturer's instructions for draining fuel and handling gasoline.
Do not pour old gasoline onto the ground or down a drain. Place it in an approved fuel container and use your local household hazardous-waste or fuel-recycling program.
1. Confirm that the fuel is stale or contaminated
Gasoline and two-cycle fuel deteriorate during storage. Fuel that smells sour or varnish-like, looks unusually dark, contains debris, or has separated may cause hard starting, poor running, or a carburetor that will not pass fuel.
If the trimmer has been stored with fuel for a long period, do the following:
Move the trimmer outdoors and disconnect the spark-plug wire if the manufacturer's instructions permit.
Drain the tank into an approved container.
If the trimmer has a removable fuel filter or accessible fuel line, inspect it for dirt or gel-like deposits.
Add fresh fuel mixed at the exact ratio specified by the manufacturer. Do not guess the oil-to-gas ratio.
Do not mix fresh fuel with a large amount of visibly bad fuel and expect the problem to disappear. A small amount of residue in the carburetor can still restrict the passages.
Product prices and availability are accurate as of the date/time indicated and are subject to change. Any price and availability information displayed on Amazon.com at the time of purchase will apply to the purchase of this product.
2. Check what the primer bulb is doing
The bulb should generally move fuel through the system when pressed several times, but exact operation varies by trimmer design. Use the behavior as a clue:
The bulb stays empty: The fuel may not be reaching the bulb. Look for a blocked fuel filter, pinched line, incorrect line routing, a cracked line, or a loose tank connection.
The bulb fills but will not become firm: The bulb, fuel lines, carburetor diaphragm, or check valves may be leaking or failing to move fuel correctly.
The bulb collapses and stays collapsed: The tank vent may be blocked, or a fuel line or filter may be restricted. Loosening the cap briefly can be a diagnostic check, but do not operate the trimmer with a loose cap unless the manufacturer specifically permits it.
The bulb is cracked, cloudy, sticky, or deformed: Replace it with the correct part rather than trying to seal it with glue or tape.
The bulb fills with dirty fuel: Stop priming and clean the fuel system. Pushing contaminated fuel into the carburetor can worsen the blockage.
The primer bulb itself is not always the source of a fuel problem. It is part of a system that includes the tank, fuel lines, filter, carburetor, and tank vent.
Product prices and availability are accurate as of the date/time indicated and are subject to change. Any price and availability information displayed on Amazon.com at the time of purchase will apply to the purchase of this product.
3. Inspect the bulb, fuel lines, and tank connections
With the engine off and the tank drained, inspect the bulb and visible fuel lines for cracks, brittleness, soft spots, kinks, or wet fuel residue. Pay particular attention to the points where the lines enter the fuel tank and connect to the carburetor or primer assembly.
A line that allows air into the system may prevent the bulb from drawing fuel even if it does not visibly leak gasoline. Replace damaged lines with fuel-compatible tubing of the correct size. Do not substitute ordinary vinyl tubing unless the manufacturer specifies it for fuel use.
If the fuel lines were recently replaced, verify their routing against the trimmer's service diagram. Reversed or incorrectly connected lines can make the primer bulb appear defective.
4. Inspect the in-tank fuel filter
Many gas trimmers use a small filter attached to the fuel line inside the tank. Stale fuel can leave deposits that restrict this filter. If the filter is visible and the manufacturer's instructions allow removal, check it for dirt or discoloration and replace it when appropriate.
Avoid fishing around in the tank with improvised tools that could damage the fuel line or tank. If the filter cannot be accessed safely, a small-engine repair shop can service it.
5. Check the air filter and spark plug
A restricted air filter can make a trimmer run rich, smoke, or refuse to start. Remove the filter according to the manual and clean or replace it as directed. Do not saturate a paper filter with oil, and do not wash a filter unless its instructions specifically allow it.
Remove and inspect the spark plug only with the engine cool and the ignition disabled. A wet plug may indicate flooding; a heavily carbon-coated or damaged plug may need replacement. Use the correct plug type and gap specified for the trimmer. If you are not comfortable working around the ignition system, have a qualified small-engine technician handle the check.
6. Clear the carburetor only as far as the manual allows
Fresh fuel may not restore a trimmer if stale fuel has hardened inside the carburetor. Symptoms include a primer bulb that will not draw fuel, an engine that starts briefly and dies, or an engine that runs only when fuel is sprayed into the intake.
Some carburetors can be cleaned with an approved small-engine cleaner, while others require diaphragm, gasket, or carburetor replacement. Do not enlarge jets with wire or disassemble the carburetor without documenting the part positions. Small passages and check valves are easy to damage or reinstall incorrectly.
If the trimmer still will not prime after the fuel, bulb, lines, filter, and air filter are known to be good, carburetor service is often the next reasonable step.
7. Reassemble and use fresh fuel correctly
After replacing a bulb, line, filter, or carburetor component, confirm that every connection is secure and that the fuel lines follow the correct routing. Fill the tank only with the fuel type and two-cycle mixture specified by the manufacturer.
Use a clean, approved fuel container. Mark premixed fuel with the date it was prepared, and avoid keeping more fuel than you expect to use within its recommended storage period. Fuel stabilizer can help when used according to its label, but it does not reliably restore gasoline that has already degraded.
Prime and start the trimmer using the exact choke and primer sequence in the owner's manual. Repeatedly pressing the bulb after the engine is flooded can make starting harder.
When to replace the bulb, repair the trimmer, or move on
Replace the primer bulb when it is cracked, permanently distorted, leaking, or too brittle to flex. Replace fuel lines or the tank filter when they are hard, split, clogged, or contaminated.
Carburetor cleaning or replacement is reasonable when fresh fuel and an intact fuel-delivery system do not solve the problem. A repair may not be worthwhile if the trimmer also has low compression, severe crankshaft damage, extensive fuel-system corrosion, or multiple unrelated failures. At that point, replacing the trimmer may be more practical than paying for diagnosis and parts.
Stop and seek professional service if fuel leaks near the engine, the tank or carburetor is damaged, the engine backfires repeatedly, or you are unsure how to safely work on the fuel or ignition system.
Yes. Stale fuel can clog the in-tank filter, fuel lines, or carburetor passages. A damaged bulb, incorrect line routing, or a blocked tank vent can cause the same symptom.
Should I keep pressing the primer bulb if the trimmer will not start?
No. Follow the manufacturer's priming procedure. Excessive priming can flood the engine, especially if fuel is already reaching the carburetor.
Why does the primer bulb fill but the trimmer still will not start?
Fuel may be reaching the primer circuit without reaching the engine correctly. Check the air filter, spark plug, fuel-line routing, carburetor, and choke procedure. Stale fuel can leave a carburetor restricted even when the bulb appears to work.
Can I use fuel stabilizer to fix old gas?
Usually not. Stabilizer is intended to help preserve suitable fuel; it does not reliably remove varnish or restore fuel that has already degraded. Drain questionable fuel and use fresh fuel mixed to the manufacturer's specification.